Just Add Sprinkles (Gluten Free)

Impromptu celebration with my little man.. because time slips through our fingers if we don’t stop to enjoy each moment!
I chose to use a small milk jug, but you can use any cup.

Dip the rim into a flavored syrup of your choice or honey.

Then stick the dipped rim in sprinkles.

Pour the milk (I used Horizon Organic, but you can easily use coconut or almond milk.)

Add a festive straw and you have yourself an easy way to brighten up any meal. ❤

Pair with dessert/ treat of your choice.  I love Udi’s Dark Chocolate Brownie Bites (I added some sprinkles)
Enjoy!

image

“Fire Pit and Pergola and Pavers, Oh My!!”

When you have a vision on how your dream home would look, you don’t necessarily need to build a brand new home from scratch to turn it into what you envision.  A realistic vision, patience and a good tactic to save for the estimated expense are all you need as long as you do not intend to add square footage to your home.  We purchased our home via “short sale” and have always focused on maintaining a lifestyle that thrived off of one income, the rest was savings.   After all of the circles and hoops we jumped through, we finally closed after almost a year from our initial intent to purchase the home from the bank.  Almost 2 years and one baby later and we managed to get the inside to where we wanted, so we decided to conquer the outdoors.

You can achieve the results you want by being modest and realistic, it doesn’t take millions…. Here’s a peek at our new haven:


Pavers, Pergola and Firepit : A Better Paver  (Let them know the Boy Family Sent ya’!!)

Drapes: Wayfair

Cushions: Red = Garden Ridge Navy/White Striped = Burlington 

Tiki Torches = Garden Ridge

Weather proof bench/storage chest = Sam’s Club

Lanterns = HomeGoods

We did repaint the house as well.  Those pics will be posted soon as well… stay tuned!!


Watercolors Were Made For Spring

I’ve always been the type of person to get excited for new seasons and holidays, but could never get myself to change my whole decor for any other holiday aside from Christmas.  This year, I challenged myself to make our home festive.  That way our son has a tradition to look forward to as he gets older.  Spring is upon us and with that comes Easter…… BUT I can’t do all the eggs, bunnies and pastels everywhere.  So here’s my latest concept.  For spring it will be the Watercolor Wall and every season/ holiday going forward I will swap out the images and give it a new name in hopes that once our son gets older, he will look forward to swapping and choosing the festive images with me.

image

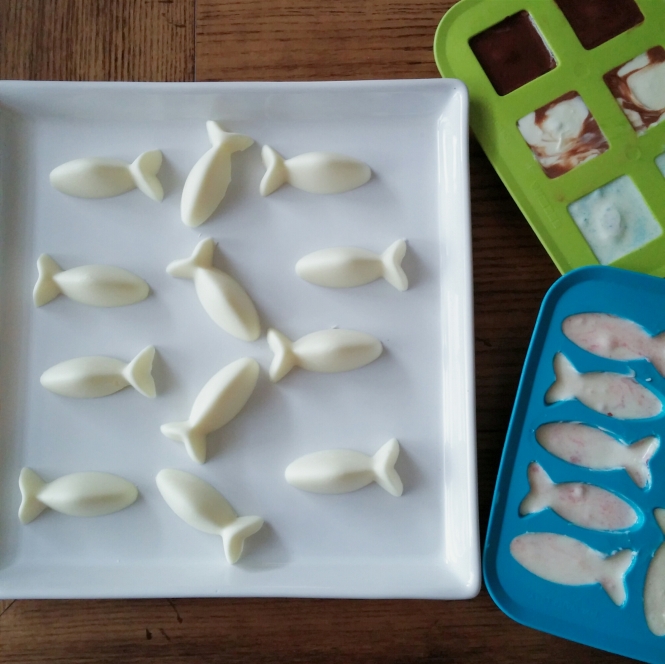
Multipurpose Ikea Ice Cube Trays

image

As I prepare for my baby boys 1st birthday I always keep an eye out for anything that could make a cute cheap addition…. I happened to come across these silicone like ice trays at Ikea and couldn’t help but think, “These would make cute chocolate molds.” They even say.”For water only” on them.  But, at $.99 a piece and with a lot of fun shapes to choose from, I did it anyway.
°After cleaning the trays, I sprayed them lightly with a can of cooking oil spray (I prefer coconut).
°I then purchased my favorite bag of chocolate chips and in a separate bowl I popped them in the microwave to melt. (30 seconds- 1minute depending on the amount then stir)
°Once the chips are melted into a creamy texture I pour them into the oil sprayed trays.
°Slightly tap the tray against the surface to settle the chocolate.
°Then take the linear edge of a spatula and pass it over the top to even out the excess, if any.
°Put in the fridge for about 5 to 10 minutes and you have yourself some cute chocolates

The best part about these trays, with them being silicone you can flip them over and easily pop out the chocolates.
Once you think you got it figured out you can start getting creative and adding colors, nuts, flavors etc.
Enjoy!!

Reusing Valentine’s Goodies

Who said you can only buy Valentine goodies for Valentine’s day?
I managed to make it to my local Wal-Mart just as they marked the Valentine items to 75% off 0f the original price. I made out like a bandit and purchased tons of Valentine sugar and shortbread cookies for just .25 each.  The key is to look for items that do not rely on the Valentine print exterior to stay fresh, items with an expiration date that doesn’t conflict with your specific event date and items that don’t cater to a specific theme.  In my case, these cookies were packaged and then then placed in the Valentine themed boxes.  As soon as I remove them from the box, they turn into a generic treat!!  So I made some graphics that matched a birthday them I was planning and, printed it on cardstock, cut it to the size of the pkg and then stapled it to he top of the cookies.
Super easy and an extremely affordable way to repurpose Valentine treats.

image

before... and after

Neutral Toned Baby Dedication Party Decor and Details (christening/ baptism)

Tassel garland, cake bunting and caramel apples were done by myself.
Cookies were from Cookie Cutter Creations 
Cake was a plain vanilla and buttercream cake filled with guava and pudding. A special Event Planner at Publix helped us achieve the vintage like frosting and we also had sandwich platters for those that wanted more than a dose of sugar.
And who could forget the Krispy Kremes!!! Mmmmm

image

image

image

image

Deep Fried Bananas

Deep fried bananas battered in whole wheat flour, cooked in coconut oil and garnished with honey and caramel.

To sweeten the batter (water and whole wheat flour) I added a dab of vanilla extract, a teaspoon of sweetened vanilla almond milk and a pinch of sugar.  While pan and coconut oil warm, I mix the batter until achieving a smoothie like consistency.
Cut small pieces of banana and dip/cover in the batter and fry until golden.

Depending on your mood you can choose to garnish with honey, caramel, chocolate or even ice cream ( pairing with coconut ice cream makes for a great combo.)

Easy quick treat, enjoy!

        
image

Easy sweets in 10 minutes Banana & nutella wafers

This is my take on a quick recipe I saw on pinterest. 

What you will need:
°Box of mini vanilla wafers
°1-2 ripe bananas
°1 table spoon of Nutella or another hazelnut spread
°A small bowl filled with your choice of sprinkles or crushed graham crackers
°1plastic sandwich bag
°Scissors

Place several wafers on surface flat side up.  Then take sandwich bag and fill with a tablespoon of nutella.  Squeeze nutella to one corner of the bag and twist the opening shut.  Take scissors and make a small incision in the corner of the sandwich bag that contains the nutella.  Begin to squeeze a pea sized amount on each wafer.
Peel banana and begin to slice 1/4inch pieces and place on half of the total amount of wafers.
Place the other half of wafers with no bananas on top to make a sandwich like treat.
Take the dessert treat and roll the side with the exposed banana into sprinkles or crushed graham crackers. 
Use remaining nutella to decorate the top of the treat and You have yourself an easy, cute and practical treat in minutes!
image

DIY Tassel Garland

As I currently prepare and gather decor to put together a small Dedication brunch, I could not seem to find a gender neutral theme that didn’t involve blues or pinks and that didn’t involve fees to have someone custom make the items with the gender neutral color theme of my choice… so here I go.

To make any tassel garland you will need:
image

°String
°Scissors
°3-4 colors of tissue paper (theme colored.)
*2-4 sheets of each color (one sheet makes 2 tassels.)

image

image

image

image

image

image

image

image

It’s really up to you how many tassels you choose to have and the length of your garland.  I typically like to maintain atleast 1 inch between tassels.
image

image